Entry 2 | Padlet


Padlet is an online collaboration tool that acts as a virtual notice board where users can share, collect, and organise different kinds of content. It provides a space for users to post notes and share images, videos, documents, or other forms of multimedia, as well as to communicate and collaborate with other users through one another's content. Dr. Norazah often conducts blended learning through Padlet alongside Google Classroom, so I have been thoroughly exposed to its features and have recognised its benefits. What are they exactly? Read up on them below!
What can you do on Padlet?

Padlet essentially allows users to express their creative liberty by providing them with a space, that is to be filled up like a blank canvas, to dump any content of their choosing and helps them curate such content in a more organised manner. It can be utilised for a multitude of purposes, for example, a user can build a portfolio on Padlet, turn it into a library for educational resources, or simply treat it as a notes app. The Padlet can also be personalised to the user's liking, including being able to customise the background, font style, and layout of their Padlet.
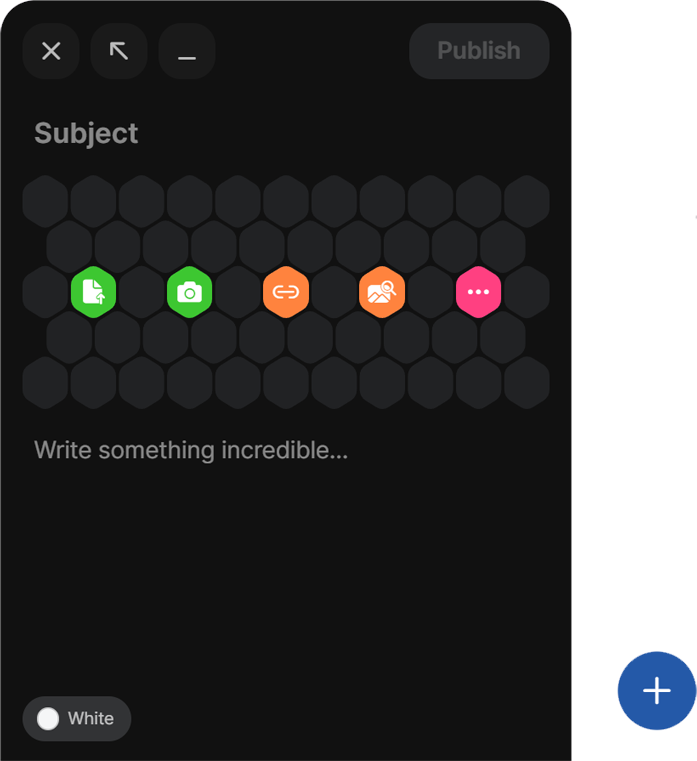
To start filling up their Padlet, users can click on the "+" sign at the bottom-right corner of the website to create a post. Almost every type of content format is supported by Padlet, therefore users can either simply jot down their thoughts in a post, or even attach files such as images, videos, and documents from their computer.
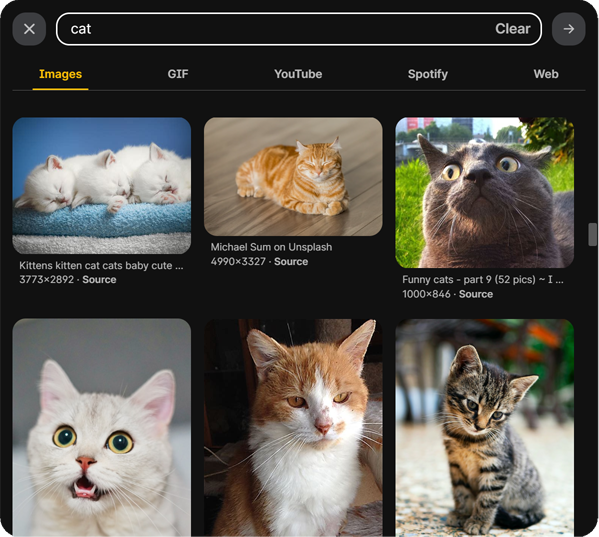
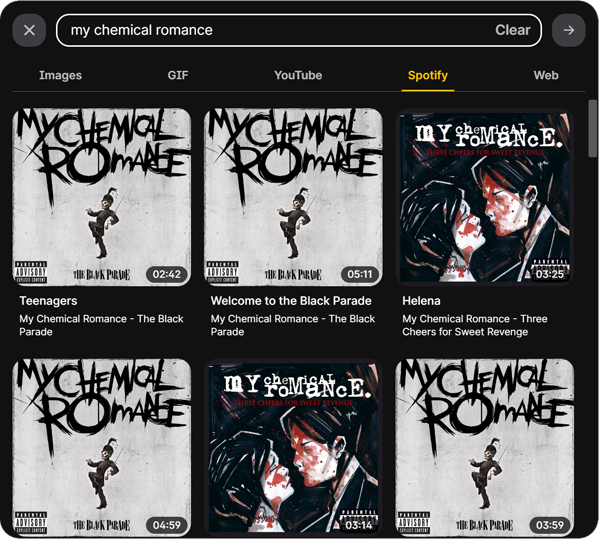
Aside from that, users are not only able to search for images and GIFs from the internet to be inserted into their post, but they even have the option to put Youtube videos, Spotify songs, and links to other websites too!
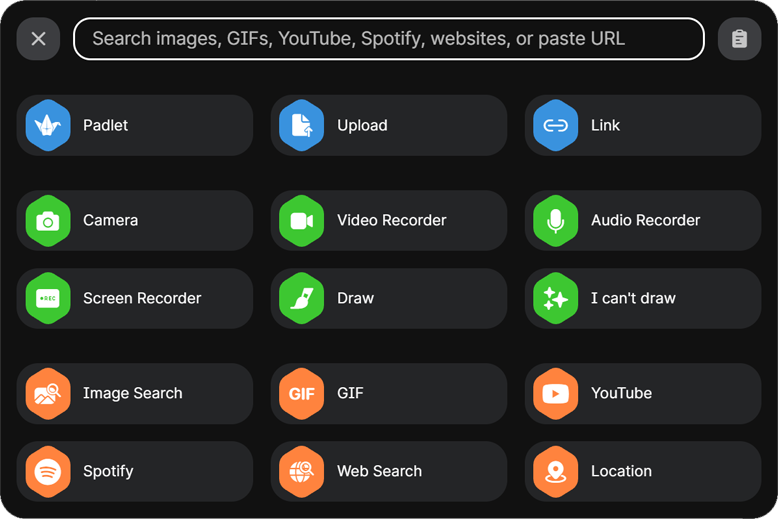
Other features include users being able to take photos, as well as record videos, audio, or their screens through Padlet itself using its camera or recorder options.
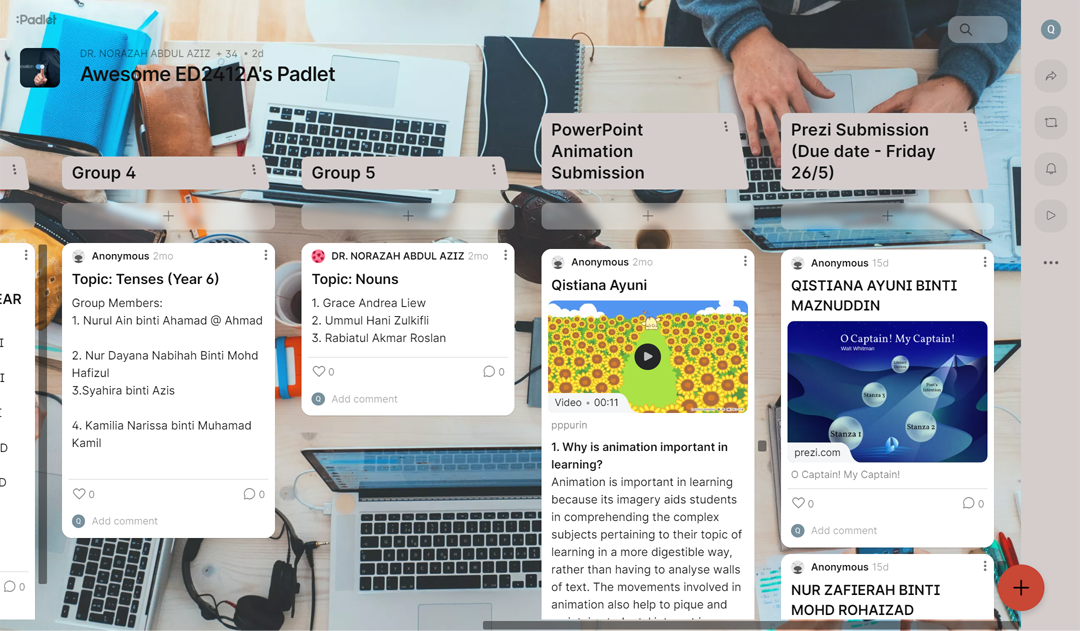
Besides curating a personal Padlet, users can also create or join a shared Padlet. Through it, they are able to share their content with other users, as well as see theirs. Users are also able to collaborate in a shared Padlet through leaving feedback on each other's posts, such as by adding a comment or simply leaving a like on them.
How does it assist educators in teaching?

Padlet can act as a digital repository for academic resources. Teachers can post notes and attach documents, photos or videos, links, and other multimedia on the virtual notice board to share with their students. This helps to centralise and organise a teacher's teaching material all in one place that is easily accessible for students to refer to anytime. Owing to that, students will also not overlook any resources and are able to easily browse through their material of choice.
Besides that, it helps teachers facilitate class discussions. Teachers can post questions on Padlet for students to reflect on and share their thoughts to. These questions can stimulate critical thinking in students as they analyse and try to formulate a response for the intellectual discourse, hence indirectly deepening their understanding of the topic. Then, teachers can provide feedback in real-time to agree with their students' perspectives or correct any misconceptions they might have regarding the topic discussed.
Padlet can also be used for teachers to conduct assessments. As I mentioned above, teachers can post prompts for students to provide answers to, of which they can then review. Teachers can also assign their students to upload multimedia assessments, such as presentations or videos about their subject matter, to be evaluated on. Aside from that, teachers are able to carry out group assessments by providing a shared Padlet for each group of students to collaborate on and compile their contributions to.
How does it aid in students' learning?

Padlet encourages interaction among students. It provides a platform for students to share information or resources, contribute their ideas, and collaborate on projects. Students can then engage with the materials shared by their peers, as well as incite a discussion under each other's opinions or reflections relating to their topic of learning. This process of students mutually exchanging their knowledge, feedback, and thoughts will promote peer-to-peer learning and foster synergy in the classroom.
Next, it can enrich students' learning experience. It supports the use of multimedia resources, whereby students can upload and share images, videos, documents, as well as other materials with their peers. Such resources will not only have greater appeal to students compared to traditional text-heavy materials, but they also provide them with visual aid and interactive content. This will create a more immersive and dynamic learning experience for students, hence increasing their interaction and engagement with the lesson.
Padlet can also stimulate critical thinking in students. When engaging in discussions on a shared Padlet, students are able to trade their ideas and opinions about their topic of learning with their peers. By doing so, they can agree with and build upon each other's ideas, or give counter-arguments to challenge one another's opinions. This will cultivate critical thinking in students as they try to understand the subject matter from different perspectives and build a constructive dialogue in response to their peers.
Making your own virtual notice board


1. Go to https://padlet.com/dashboard
2. Click on  at the top-right corner of the website to start making your own!

3. Browse through the formats provided and choose your desired one.
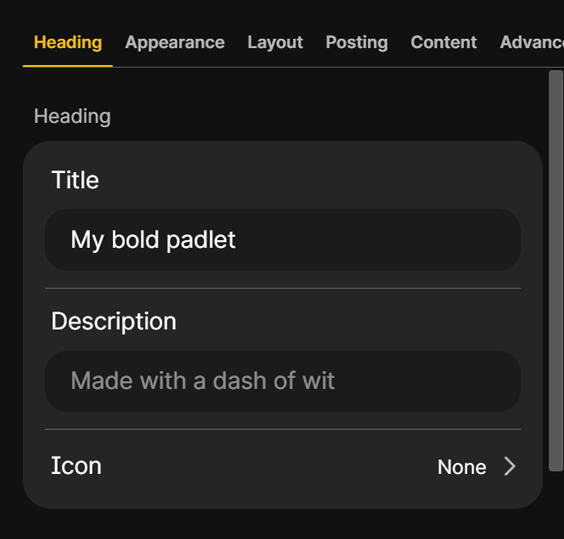
4. Under the "Heading" section, name your Padlet and add a short description. Click on "Icon" to set up an icon for your Padlet.

5. You can browse and choose from the emojis provided to be set as your icon or you can insert a custom icon. To insert a custom icon, you can either upload a file from your computer, draw your own icon, attach a link of an image, or search for an image or GIF from Google or Giphy respectively. Once you have picked an icon, click on "Save".
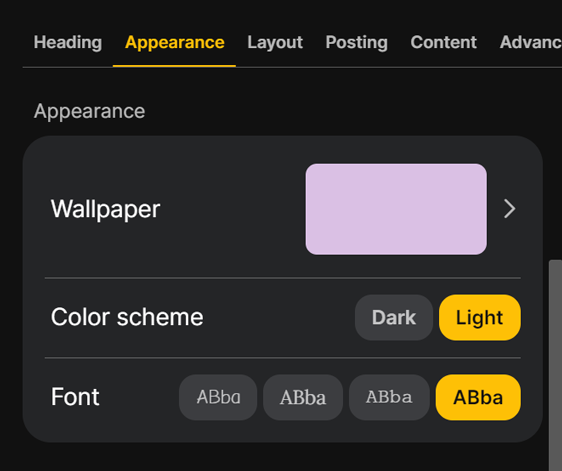
6. Under the "Appearance" section you can customise the background of your Padlet, decide whether you want it to be in dark or light mode, and choose its font style.
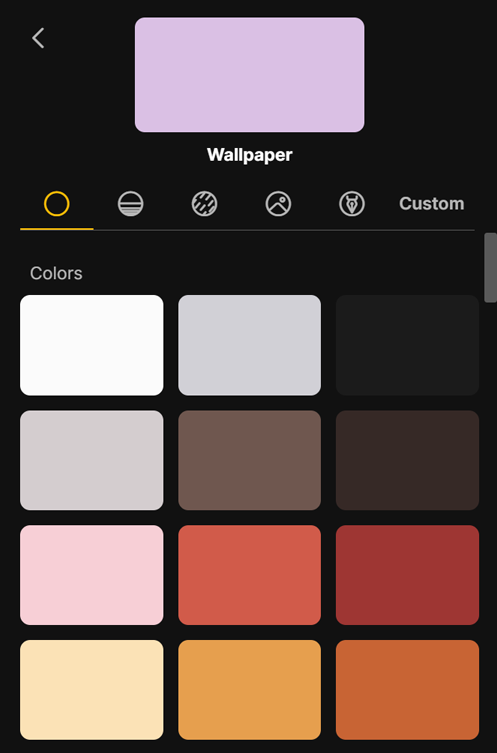
7. When you click on "Wallpaper", you can pick a background from the colours, gradients, textures and patterns, photos, or art and illustrations provided, or insert your own background similar to the steps for inserting a custom icon.
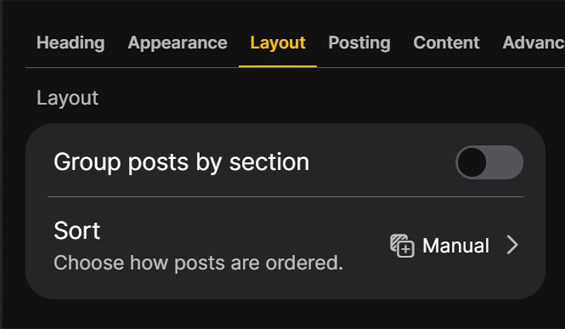
8. Under the "Layout" section, you can decide whether you want your Padlet posts to be grouped under sections or not by toggling the switch. You can also determine how your posts are to be sorted, such as from new to old and vice versa, according to the date published, in alphabetical order, or even randomly.
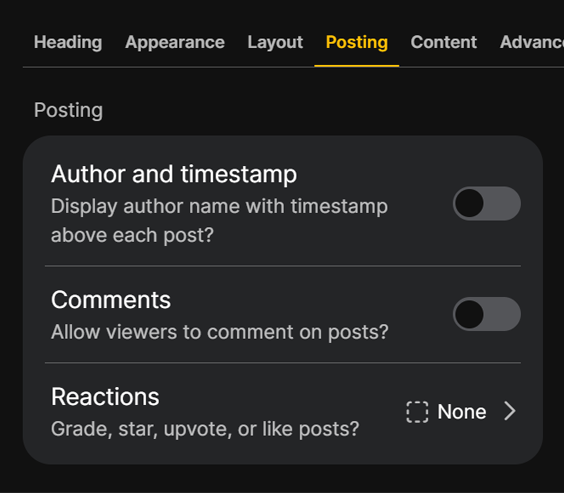
9. Under the "Posting" section you can set whether the name of the visitor who adds a post on your Padlet would be displayed along with the post's timestamp or not, as well as whether to allow comments on posts. You can also enable the reaction feature for visitors, which ranges from allowing them to like, upvote or downvote, give star ratings, or grade posts.
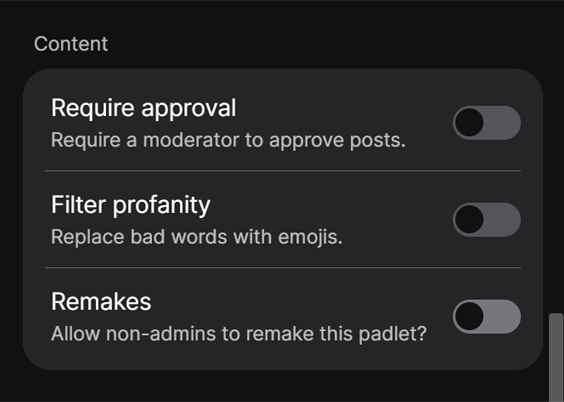
10. Under the "Content" section, you can set whether visitors require your prior approval for their posts or not, as well as whether to enable the profanity filter to block the use of vulgar language from being posted on your Padlet.
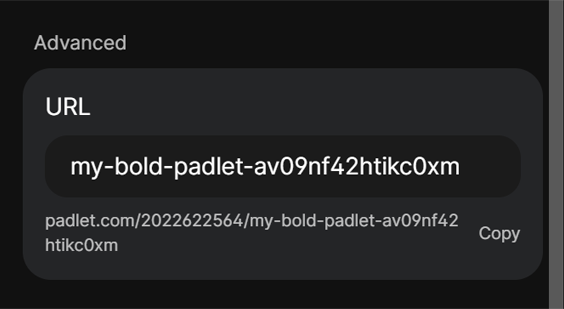
11. Finally, you can customise the URL of your Padlet under the "Advanced" section. Now, your Padlet is done and officially ready to be shared with others!

.png) Home
Home .png)