.png) Home
Home .png)
Entry 4 | Canva


Canva is an online graphic design tool that allows users to create various kinds of materials such as presentations, infographics, and other forms of multimedia, as well as to edit photos or videos. It has a simple drag-and-drop interface which even beginners with zero experience in designing can easily navigate through, moreover, thousands of templates and resources are readily made available for their use. Whenever I am assigned to do a presentation, I always turn to Canva instead of PowerPoint or Prezi to make my slides. Why is that? Find out in the next section!
What can you do on Canva?


Besides its interface that is easier to use and more user-accessible compared to other similar tools, the main reason as to why I prefer using Canva is because of its attractive features. Canva possesses an expansive library of templates, ranging from posters to comic strips, that are tailored for a plethora of purposes, whether it be for educational use or social media branding, for users to utilise and customise. Users can add filters to find a template that is most to their liking or enter specific keywords in the search bar to find a particular template.
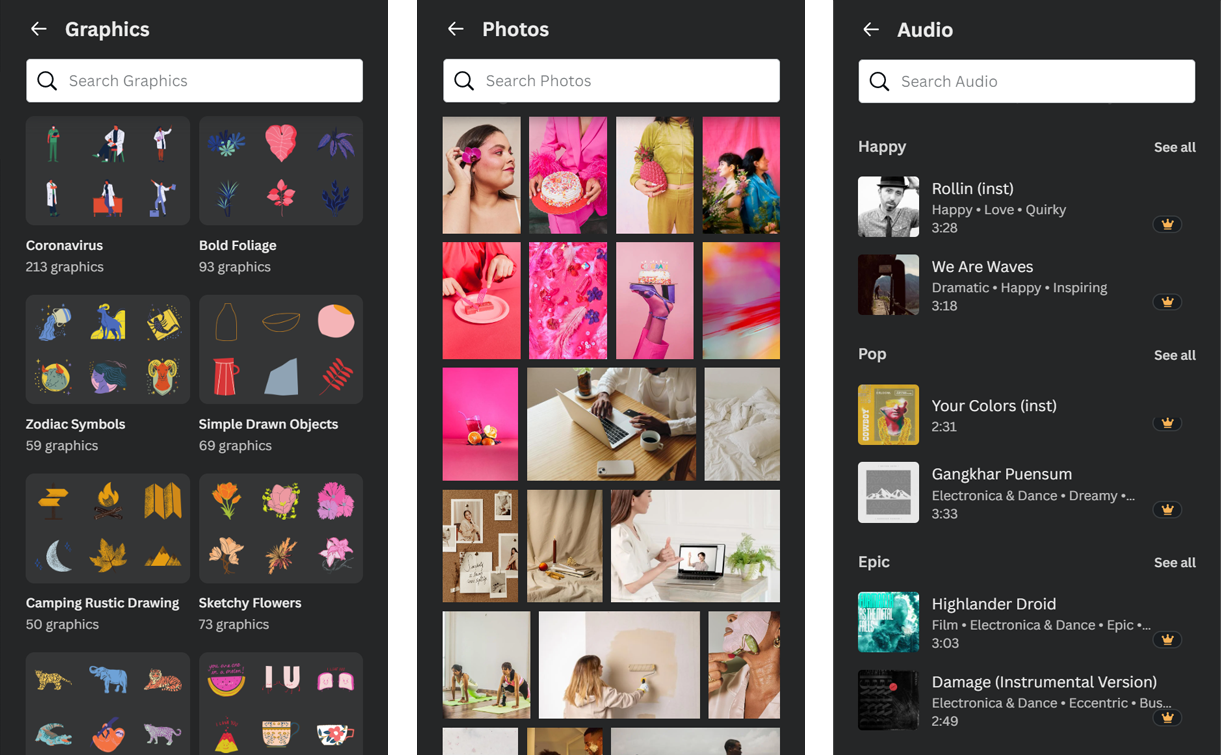
For users who want more creative freedom and design from scratch, Canva also offers a myriad of resources including lines and shapes, graphics, as well as stock photos, videos, and audio. A little fun fact is that some of these resources are animated! So, users are able to make their designs more exciting and interactive. If users are still unsatisfied with Canva's thousands of resources, they also have the option to upload their own photos, videos, and audio.
Something to take note of is Canva does have a premium subscription, meaning that some of these templates and resources are reserved for premium users only. Nevertheless, free users are not restricted from using them completely, only that watermarks will be visible on these resources if used.
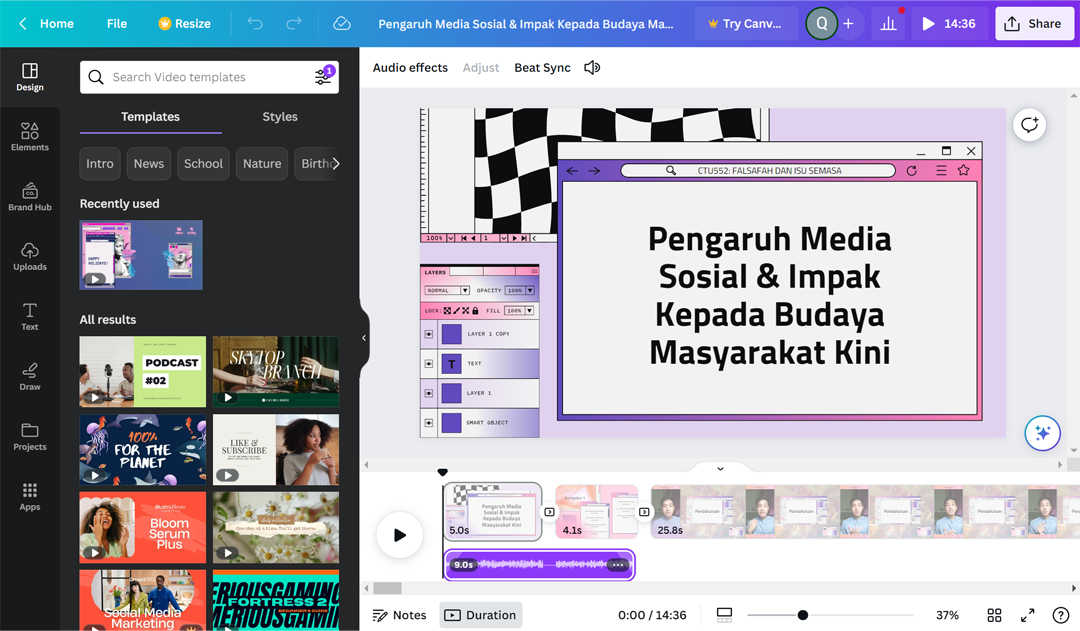
Besides creating static designs, users can also edit videos through Canva. On top of Canva's basic features as mentioned above, basic video editor tools such as trimming the length of a video or audio, adjusting the video speed or audio volume, as well as adding audio effects are also included.
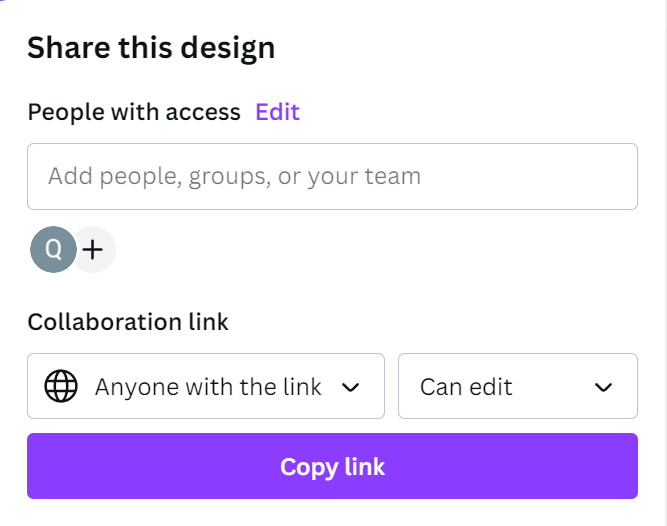
Another feature Canva offers is the option for users to collaborate with other users on their work. A user can grant another one access to their project by adding their email address or by sending them an invite link. Upon accepting the invitation, users can simultaneously work on one design together in real-time.
How does it assist educators in teaching?
Canva helps teachers to deliver their lessons more effectively. Rather than instructing students to refer to their textbooks, a teacher can use Canva to make a more succinct presentation, with the addition of interesting graphics or animation, covering the subject matter they intend to teach. With less text to digest, students will be able to comprehend their topic of learning easier. Moreover, the graphics and animations will provide students with visual aids as well as maintain their interest in the lesson.
Next, it allows teachers to create attractive teaching materials for their lessons. Teachers can design their own reading materials and printable worksheets pertaining to their topic of teaching from scratch, or utilise Canva's thousands of ready-made templates. By designing their own teaching materials, teachers will be able to tailor them to fulfil their teaching objectives as well as their students' needs better. The materials will also appeal more to the students compared to traditional reading materials, thus increasing their engagement with them.
Canva also enables teachers to assign work to their students and monitor their progress. Teachers can sign up for a Canva For Education account to create a virtual classroom which functions similarly to how Google Classroom works. Through it, teachers can design and publish personalised assignments using Canva to be delegated to their students. Then, teachers will be able to monitor their students' progress on those assignments and leave feedback once they have turned in their work.
How does it aid in students' learning?
Canva aids students in creating more captivating presentations. By utilising Canva's simple drag-and-drop interface, as well as the myriad of resources and readily available templates, students can easily create slides, videos, and infographics to demonstrate the things they have learned in a lesson. These designs will also allow students to organise and convey their thoughts, ideas, and findings in a clearer, more engaging way for the audience.
Next, it enables students to collaborate in group work. A student can grant their peers access to their project which will allow them to work together on the same design in real-time. This enables them to add and modify elements, images, or text onto their project simultaneously. By collaborating on projects, not only will students get their work done faster, but they can also practise teamwork and boost communication skills through the delegation of tasks.
Canva also enhances students' digital literacy skills. Through experimenting with Canva while completing classwork, students will indirectly learn basic digital skills and sharpen their pre-existing ones. When designing a project, students will be exposed to basic digital skills such as knowing how to insert text or media, copy and paste, as well as upload or save files. Additionally, students will also pick up complex skills like being able to edit a photo or video, including cropping, trimming, and adjusting their colour settings.
Start designing with Canva
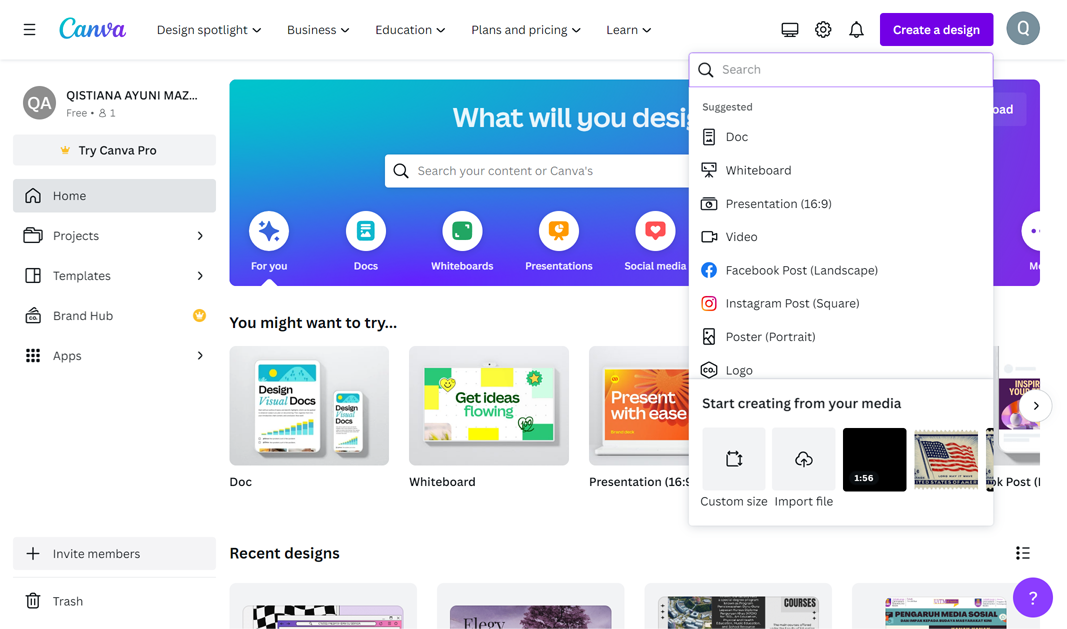
1. Go to https://www.canva.com
2. Click on ![]() , and choose the type of material you intend to design.
, and choose the type of material you intend to design.
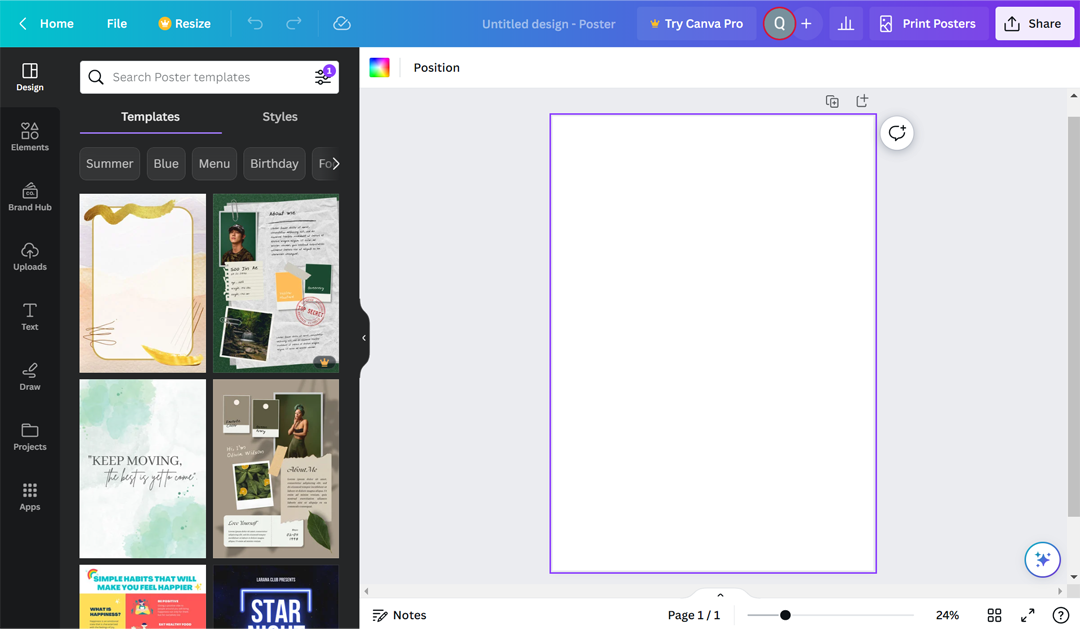
3. Click on the "Design" tab on the left sidebar to browse through templates and pick your desired one to start customising. You can narrow down your selection by entering keywords in the search bar. (Skip this step if you choose to design from scratch)
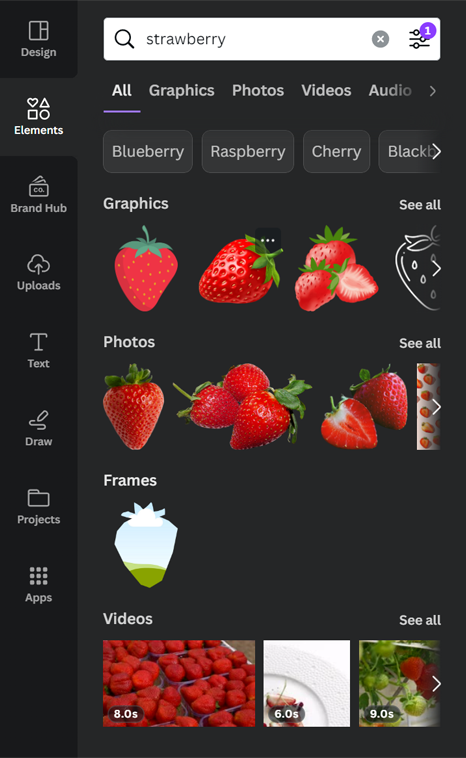
4. To add graphics to your design, click on the "Elements" tab and specify the graphic you want to find in the search bar. Apply filters and browse through the specific categories to reduce your options. Then, drag and drop your graphic of choice onto your design.
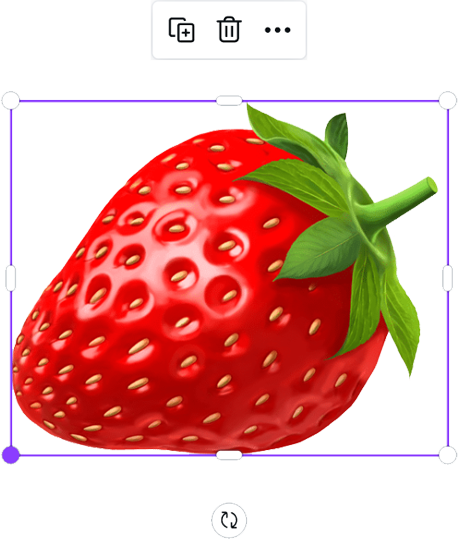
5. You can resize the graphic by clicking and dragging its corners, rotate it by clicking on the rotate icon and rotating it as desired, or delete the graphic by clicking on the trash bin icon.
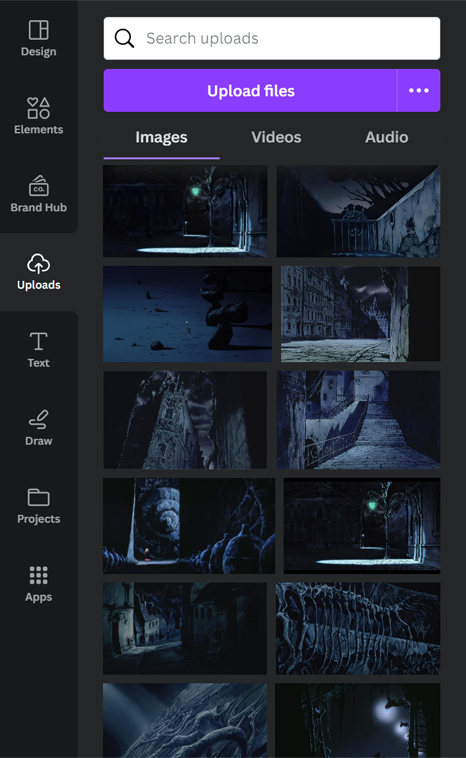
6. To upload your own graphics, click on the "Uploads" tab. Then, click on "Upload files" to upload a file from your computer.
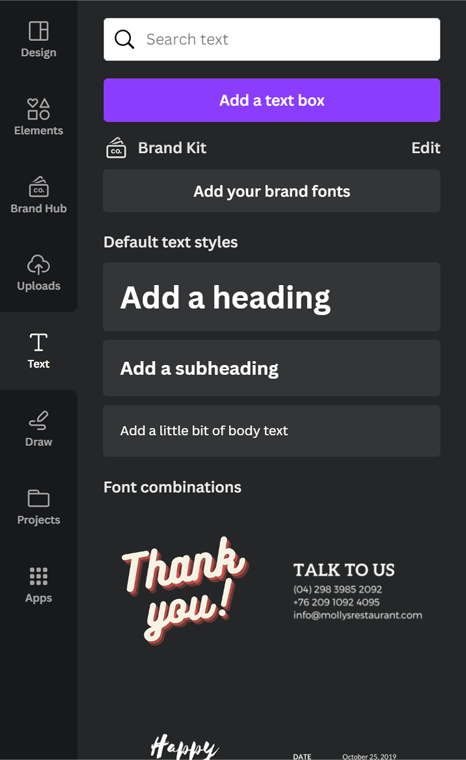
7. To add text to your design, click on the "Text" then click on "Add a text box".

8. You can modify the text's settings, such as its font style, size, colour, alignment, or line-height by navigating through the menu bar at the top.
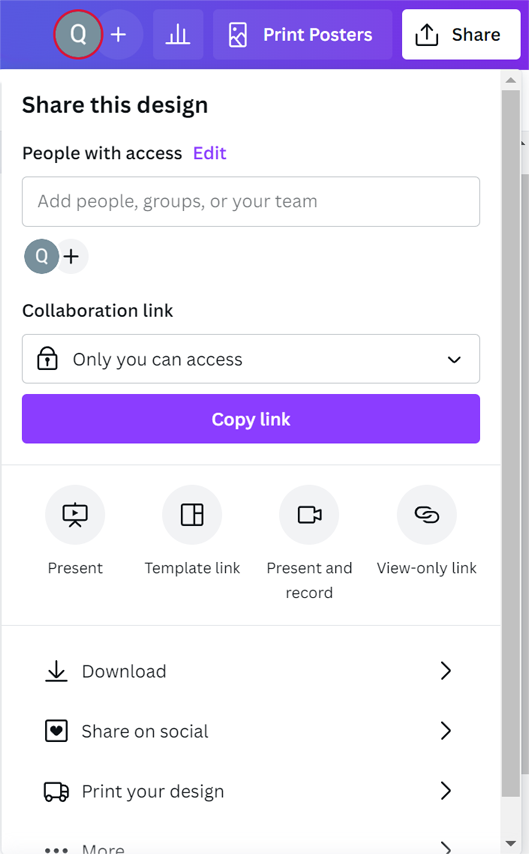
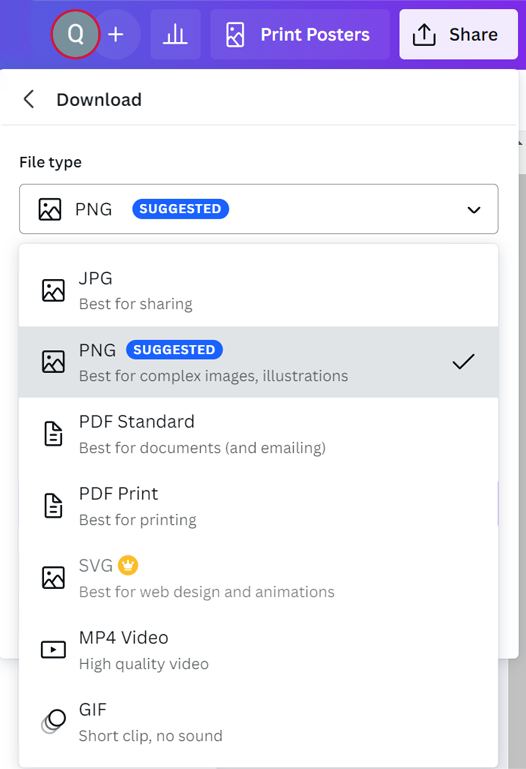
9. To save your project onto your computer once you have completed and are satisfied with it, click on "Share" at the top-right corner. Click on "Download", then navigate through the dropdown menu to choose the file type which you desire to save your project as. Voila! You have successfully made your first-ever design on Canva!
10. However, if you are not done with your project and wish to continue designing it at a later time, do not worry! You can just exit Canva as your project has already been autosaved.